
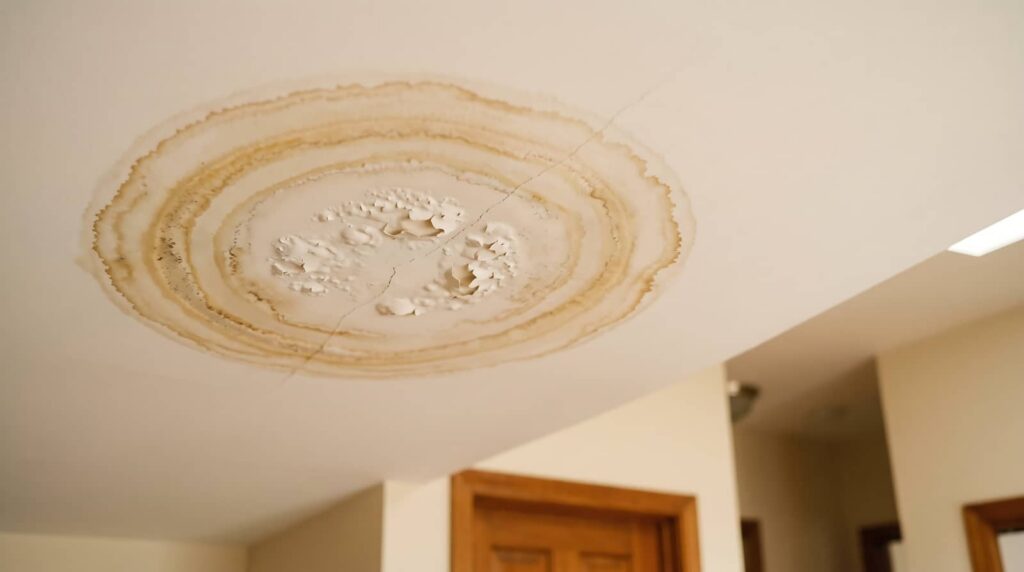
When you spot ceiling water damage after a leak or flood, you need to act in order: stop the water source, cut power to the affected area, and inspect for sagging or stained drywall. Then you’ll need to dry the ceiling fully, check for mold, and assess what material can still be saved. The real question is how much hidden damage is already there, and that’s where the next step gets critical.
Key Takeaways
- Shut off electricity and protect the area with buckets, tarps, gloves, and eye protection before inspecting ceiling water damage.
- Trace the leak source by checking the roof, flashing, plumbing lines, and attic for active drips, wet insulation, or damaged materials.
- Avoid pressing on sagging ceilings; use stable ladders and mark suspected leak origins for organized repairs.
- Dry the area thoroughly with fans, dehumidifiers, and open windows, then check moisture levels and treat any mold.
- Remove damaged drywall, patch with matching material, prime stains, match texture, and repaint for a finished repair.
Stop the Leak and Check for Safety
Before you repair a water-damaged ceiling, stop the leak at its source and make the area safe to work in.
Shut off electricity to the affected room if water may reach fixtures, and wear gloves, eye protection, and a dust mask.
Set buckets or tarps below drips, then remove furniture and rugs so your space stays protected.
If the ceiling sags, bulges, or smells musty, don’t press on it; let it stay intact until you can manage it safely.
Good ceiling water damage repair starts with control, not force.
Use stable ladders, clear footing, and bright lighting so you can move confidently.
You’re not handling this alone—careful preparation keeps you and your home secure while you get ready for the next step.
Track Down the Leak Source
You need to find the leak’s origin by tracing the water path from the damaged ceiling back to the entry point.
Inspect the roof for damaged shingles, flashing gaps, or punctures. Then check nearby plumbing lines for active drips, loose fittings, or corrosion.
Use a methodical approach so you can identify the source before you start repairs.
Find Leak Origin
First, trace the ceiling damage back to its source so you can stop the leak before any repair work begins. You should map the stained area, then note nearby fixtures, vents, pipes, and attic access points.
Check whether the damage spreads along joists or appears around seams, since water often travels before it shows itself. Use a flashlight to inspect for drips, damp insulation, or active moisture.
If you’ve got a moisture meter, test the ceiling and surrounding wall surfaces to pinpoint the wettest zone. Shut off suspicious plumbing lines one at a time if you suspect an internal leak.
Mark the likely origin with tape so your crew can stay organized and work together efficiently. Once you’ve confirmed the source, you’re ready for safe repair planning.
Inspect Roof Damage
If the stain points to a roof leak, inspect the attic and roof structure directly above the damaged ceiling area. Start with the decking, rafters, and sheathing, looking for darkened wood, rusted fasteners, or daylight peeking through gaps.
Trace water paths uphill, because leaks often travel before they drip. You’ll work best when you move slowly and document each clue so your repair team stays aligned.
- Check shingles for cracks, curling, or missing pieces
- Inspect flashing around chimneys, vents, and valleys
- Look for wet insulation and compressed batts
- Note moldy odor, staining, or mineral deposits
- Mark every suspect spot for later repair
When you map the damage clearly, you protect your home and help your crew fix the right area the first time.
Check Plumbing Lines
Trace the plumbing runs above and around the stained ceiling area to rule out supply or drain leaks.
Check every visible joint, valve, trap, and fitting for drips, corrosion, loose connections, and mineral buildup.
If you can, run fixtures one at a time while you watch the ceiling below for fresh moisture.
Shut off water to isolate sections, then test again so you know which line belongs to the problem.
Use a flashlight and dry paper towel to spot slow seepage at pipe penetrations.
If you find active leaking, mark the location and stop using that fixture until repairs are complete.
Working methodically helps you protect your home and gives you a clear path to drying, stain removal, drywall repair, and mold prevention.
Dry Ceiling Water Damage Thoroughly
Dry the ceiling completely before you attempt any repairs, because trapped moisture can spread damage and lead to mold growth. You’ll protect your home and fit in with a crew that fixes problems the right way when you dry it methodically.
Remove loose material, then run fans and a dehumidifier to move air across the wet area. Keep windows open if outdoor air is drier. Check insulation above the ceiling and replace any soaked sections. Use a moisture meter to confirm the drywall’s core is dry, not just the surface.
- Direct airflow at the damage
- Empty standing water fast
- Keep the room warm
- Inspect hidden cavities
- Test moisture at intervals
Prevent Mold Before Repairs
Once the ceiling is dry, treat the area for mold before you start any repair work, because lingering spores can spread into new materials and worsen the damage.
Inspect the full stain zone, plus the edges, for musty odor, discoloration, or soft spots. If you see growth, wear gloves, eye protection, and an N95 respirator.
Clean nonporous surfaces with a mold-killing product labeled for ceilings, following the contact time exactly. For porous framing or insulation, remove and replace contaminated material if cleaning won’t reach embedded growth.
Keep the room ventilated and run a dehumidifier to hold humidity low. Bag debris immediately, seal it, and leave the area clean so you and your household can move into repairs with confidence.
Fix Drywall, Stains, and Texture
Once the ceiling is dry, you’ll cut out any weak drywall and install a clean patch that matches the damaged section’s thickness.
After that, you’ll seal stains with a stain-blocking primer so they don’t bleed through the finish.
Finally, you’ll match the surrounding texture and paint to blend the repair into the existing ceiling.
Drywall Patch Repairs
After the damaged area has dried, you can patch the drywall, seal any remaining stains, and restore the texture to match the surrounding ceiling.
Cut away loose material with a utility knife, then square the opening so your patch sits flush. Back the repair with a strip or patch panel, fasten it securely, and apply joint compound in thin coats. Let each coat dry before sanding lightly.
Seal any discoloration with a stain-blocking primer so it won’t bleed through. Then rebuild the surface texture with the same tool or spray pattern already there.
- Measure the opening carefully
- Use mesh or drywall patch
- Feather compound beyond edges
- Sand between coats
- Inspect for ridges, gaps, or soft spots
Stain And Texture Matching
Even when the drywall repair is solid, you still need to hide the evidence by matching the stain and ceiling texture.
Start by sealing the repaired area with a stain-blocking primer, or the old water mark may bleed through your paint. If the ceiling was textured, test a small spot first and mimic the existing pattern with spray texture, a sponge, or a stipple brush.
Build the texture in light passes so you can blend it with the surrounding surface. After it dries, lightly sand any high points, then repaint the entire section for an even finish.
You’re not just fixing damage; you’re restoring the room so it feels whole again. When the repair disappears, your space looks cared for, and you belong there again.
Know When to Call a Water Damage Pro
If the ceiling shows sagging, widespread staining, recurring leaks, or signs of mold, you should call a water damage pro. You’re dealing with concealed moisture, weakened drywall, and possible electrical risk, so fast action matters.
A qualified team can map moisture, open hidden cavities, dry structural members, and verify that repairs are complete. They also handle mold containment and documentation for insurance.
Trust the experts when:
- the damage spreads beyond one room
- insulation feels wet or heavy
- the leak source isn’t obvious
- the ceiling sags or cracks
- mold returns after cleaning
Calling sooner helps you stay safe, protect your home, and join neighbors who fix damage the right way.
Frequently Asked Questions
How Long Does Ceiling Water Damage Repair Usually Take?
Usually, you’ll need one to three days for drying, then another one to five days for stain treatment, drywall patching, and repainting. If damage’s severe, you’ll wait longer for drying and mold checks.
Can I Paint Over a Water Stain After Drying?
No, you shouldn’t paint over it yet—would you trust a hidden problem? You’ll need to seal stains, confirm dryness, and inspect for mold first. Then you can prime, repaint, and restore confidence.
How Do I Tell if Insulation in the Ceiling Is Wet?
You can tell if insulation’s wet by feeling for cool, heavy, or compressed spots, checking for staining, and using a moisture meter. If you smell mustiness or see sagging, you’ve likely got wet insulation.
Will Homeowners Insurance Cover Ceiling Water Damage Repairs?
Usually, yes, if a sudden covered event caused it. Check your policy, document damage, and file quickly; insurer adjusters’ll inspect stains, drywall, and mold risk like a detective tracing footprints.
Should I Replace the Entire Ceiling After a Small Leak?
Not usually; you should inspect the affected area, dry it thoroughly, and replace only damaged drywall if the leak’s stopped. You’ll preserve structure, save money, and reduce mold risk while keeping your home’s finish consistent.
Final Thoughts
When you stop the leak, trace the source, dry the ceiling, and block mold, you set the repair on solid ground. Then you patch the drywall, seal the stains, and restore the texture so the ceiling looks whole again. If damage spreads, call a water damage pro before hidden problems grow. In ceiling repair, haste helps nobody; careful steps now save you from repeat leaks, costly fixes, and a compromised home.