
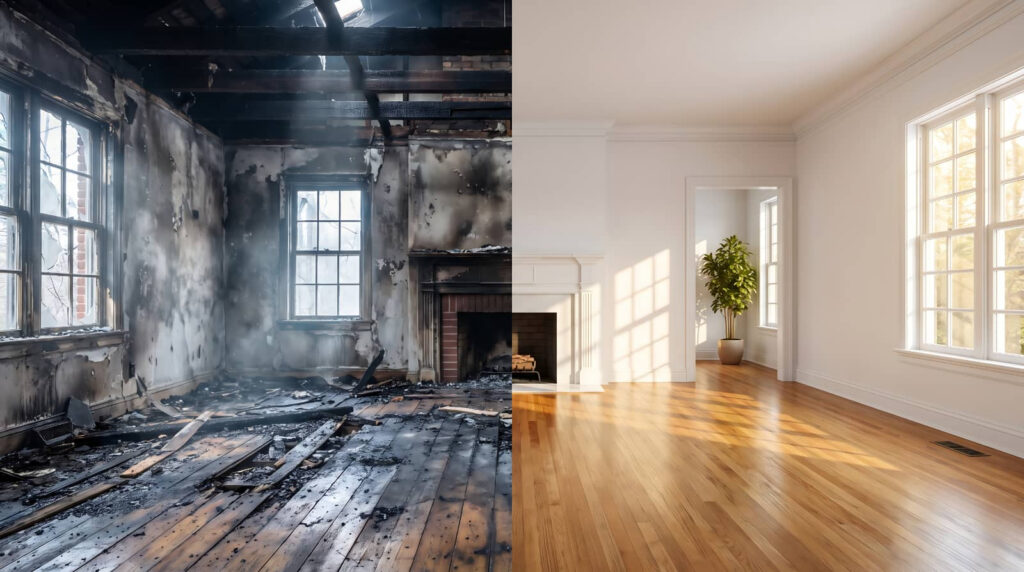
When soot coats your walls, ceilings, and contents, you need to act fast and follow the right steps, or you can drive residue deeper into the surface. Soot damage cleanup starts with isolating the area, removing loose particles with the right tools, and cleaning each material with care, because one wrong pass can smear damage across the room. The real issue isn’t just visible staining; it’s what soot leaves behind, and that changes everything.
Key Takeaways
- Seal off the area, wear gloves and a respirator, and remove fragile contents before starting cleanup.
- Remove dry soot from walls and ceilings first with a HEPA vacuum or dry chemical sponge.
- Clean surfaces gently with minimal moisture, working top to bottom and testing cleaners in a hidden spot.
- Sort contents by material, vacuum loose soot, and use appropriate cleaners on washable items without rubbing.
- Repaint or call a restoration professional if stains, odor, or soot penetration remain after cleaning.
What Soot Damage Does to Surfaces
Soot damage does more than leave a black film behind; it deposits acidic residue that can etch and stain walls, ceilings, fixtures, and contents if you leave it in place.
You’ll see fine particles settle into paint pores, grout lines, fabric weave, and vent openings, where they can dull finishes and lock in odor. Oily soot smears when you rub it, so you can spread contamination instead of lifting it.
Porous materials absorb the residue fastest, and heat can make that bond stronger. During soot damage cleanup, you need to treat surfaces as time-sensitive because oxidation keeps working after the fire ends.
Acting quickly helps you protect the room’s integrity and preserve the items you care about, so you’re not facing avoidable loss later.
Clear and Protect the Area
Seal off the work area with plastic sheeting and tape to contain soot and limit cross-contamination.
Remove fragile contents first so you don’t damage items that can’t tolerate cleaning or handling.
Protect adjacent surfaces with clean coverings before you start agitation or wiping.
Seal Off Work Area
Before you start cleaning, isolate the work area so you don’t spread acidic soot residue to unaffected rooms. Close doors, seal gaps with painter’s tape and plastic sheeting, and cover supply vents if the HVAC is off. You’ll create a controlled zone that keeps cleanup efficient and protects your team’s progress.
- Post a clear boundary sign at the entry.
- Lay plastic over clean floors beyond the perimeter.
- Tape seams at door frames and baseboards.
- Shut windows to limit air movement.
- Keep tools and waste inside the sealed zone.
Check the seal before every session. If you feel like the area is tight and organized, you’re ready to clean with confidence.
Good containment helps your crew work as one and reduces recontamination of walls, ceilings, and contents.
Remove Fragile Contents
Now that the area is contained, remove fragile contents first so they don’t get contaminated or damaged during cleaning.
You should handle glassware, electronics, artwork, textiles, and collectibles before any dry or wet soot work begins. Use clean gloves, rigid trays, and padded cartons to keep items stable and separate.
Label each container clearly so you can return belongings to the right place later. If an item is too delicate to move safely, leave it in place and note its condition for special handling.
Keep pathways clear, lift instead of dragging, and avoid stacking pieces under pressure. Group similar items together so your cleanup team can work efficiently and protect what matters most.
This careful step helps you preserve value, reduce loss, and stay organized as a team.
Protect Adjacent Surfaces
Once fragile contents are out, you need to protect nearby surfaces from soot spread and cleaning damage. Mask trim, flooring, and intact furniture before you touch the affected area. Use polyethylene sheeting, painter’s tape, and clean drop cloths to create a sealed work zone.
Keep air movement low so particles don’t drift into clean rooms. You’ll work better when you organize tools, gloves, and waste bags outside the protected area.
- Cover finished floors completely
- Seal vents and door gaps
- Wrap undamaged furnishings
- Label clean and dirty zones
- Remove coverings carefully after cleanup
Protecting adjacent surfaces limits cross-contamination and reduces abrasion from sponges, vacuums, and detergents.
When you control the perimeter, your cleanup stays precise, safe, and efficient.
How to Clean Soot From Walls
Start by removing dry soot from the walls with a soft sponge, microfiber cloth, or vacuum fitted with a brush attachment, and avoid rubbing it in.
Test any cleaning solution on a small hidden area first so you can confirm it won’t discolor or damage the finish.
Then clean the wall gently with light pressure and minimal moisture, working from the top down to limit streaking and residue spread.
Dry Soot Removal
Dry soot lifts more easily than wet soot, but you still need to handle it carefully to avoid smearing the acidic residue into wall surfaces. You can start by isolating the area and wearing gloves, a respirator, and eye protection.
Then you should use a soot sponge or dry microfiber cloth and move from top to bottom with light, straight strokes.
- Test a small spot first.
- Replace dirty sponge faces often.
- Keep pressure low.
- Work in overlapping passes.
- Bag removed debris right away.
If you see heavy buildup, stop before you grind particles into the finish.
You’re not alone in this step; careful dry removal protects the wall and keeps cleanup efficient for the rest of your team.
Gentle Wall Cleaning
If soot remains after dry removal, you can wash the wall with a mild cleaning solution to lift the acidic film without driving it deeper into the finish.
Mix warm water with a small amount of nonabrasive detergent, then dampen a soft sponge or microfiber cloth. Wring it well so you don’t saturate the surface.
Work from the bottom up in short strokes, and rinse the cloth often in clean water. Change the solution when it darkens.
Blot, don’t scrub, and keep pressure light to protect paint and wallpaper. Dry each section with a clean towel so moisture doesn’t linger.
If you’re restoring your space with care, this method helps you move forward cleanly, steadily, and with confidence.
Spot Testing First
Before you clean a larger area, test the solution on a small, hidden section of the wall to check for discoloration, streaking, or paint lift. You’ll protect the finish and avoid spreading soot residue.
Use a white microfiber cloth, a mild detergent mix, and light pressure. Wait a few minutes, then inspect under good light.
- Pick a spot behind furniture or near trim.
- Blot, don’t scrub, during the test.
- Check for color transfer on the cloth.
- Let the area dry fully before judging.
- If the finish reacts, switch to a drier method.
This step helps you work safely and confidently with others restoring the space.
It also keeps your cleanup consistent, controlled, and effective.
How to Clean Soot From Ceilings
Start by removing loose soot from the ceiling with a dry chemical sponge or vacuum fitted with a HEPA filter, working gently so you don’t grind the acidic residue deeper into the surface.
Keep your strokes light and overlap each pass so you clean evenly.
If the ceiling is painted drywall or plaster, use minimal moisture and a neutral cleaner only after you’ve removed dry contamination.
Dampen a microfiber cloth, wring it well, and wipe in straight lines, changing cloths often to avoid smearing.
Work from the edges toward the center to stay organized and limit recontamination.
If staining remains, repeat the process instead of scrubbing hard.
Protect yourself with gloves, eye protection, and a respirator, and ventilate the room so you can restore the space safely.
Clean Soot Off Fixtures and Trim
Move on to fixtures and trim by removing loose soot with a dry chemical sponge or HEPA vacuum attachment, using light pressure so you don’t spread the residue or scratch the finish.
Then wipe the surface with a cleaner matched to the material, such as mild detergent on painted trim or nonabrasive metal cleaner on brass or chrome.
- Test cleaners in a hidden spot first
- Work from top to bottom
- Change cloths often to avoid smearing
- Rinse and dry each section promptly
- Wear gloves to protect skin and grip
For detailed edges, use cotton swabs and a soft brush.
If you keep a steady pace, you’ll protect the finish and restore a clean, consistent look your space can live with again.
Clean and Save Soot-Damaged Contents
Once the fixtures and trim are clean, turn to soot-damaged contents and sort items by what can still be saved.
Group porous items, hard surfaces, and electronics so you can treat each material correctly.
Wear gloves and a respirator, then work in a well-ventilated area.
Vacuum loose soot with a HEPA tool before wiping.
Clean washable surfaces with a dry sponge or a mild detergent solution, changing cloths often so you don’t spread residue.
Launder fabric items promptly, and air-dry them completely.
For books, photos, and papers, separate damp pieces and lay them flat.
Bag unsalvageable debris right away.
As you work, label boxes so your team stays organized and every item has a clear path back home.
Avoid Common Soot Cleanup Mistakes
To prevent further damage, don’t rub soot into surfaces, use excessive water, or spray random household cleaners on affected areas. You’ll keep soot cleanup safer when you work methodically and protect the residue from spreading.
Treat soot as acidic and fragile, so every wrong move can set stains deeper and increase cleanup time. Use dry removal first, then controlled methods matched to the material.
- Vacuum with a HEPA tool
- Lift residue with soft sponges
- Test products in hidden spots
- Change cloths before they load up
- Wear gloves and a respirator
If you’re unsure, stop and reassess before you damage finishes or spread contamination. A careful sequence helps you protect your space and stay in control.
When to Repaint Soot-Stained Walls
You should assess the wall discoloration first to determine whether soot has left a light surface film or a deeper, uneven stain that cleaning can’t remove.
If the wall still shows shadowing, streaking, or odor after thorough soot cleanup, you’ll likely need to repaint.
Before you apply finish paint, seal the affected surface with a stain-blocking primer to lock in residue and prevent bleed-through.
Assessing Wall Discoloration
Wall discoloration after soot exposure often signals more than a cosmetic issue. You should inspect the wall under bright light and note gray, brown, or black film, streaking, and uneven sheen. If wiping leaves residue, the stain’s in the finish, and repainting may be the practical next step.
- Check corners, trim edges, and ceiling lines
- Compare affected areas with clean sections
- Look for patchy dullness after dry cleaning
- Test a hidden spot with a microfiber cloth
- Document discoloration before you choose paint
You’re not alone in this process; many homeowners face the same call. When discoloration stays visible after thorough dry removal, repainting helps restore a uniform surface and supports a cleaner, healthier room.
Sealing Before Repainting
If soot has penetrated the paint film or left a persistent stain after dry cleaning, seal the surface before you repaint. You’ll lock in odor, prevent bleed-through, and create a stable base for finish coats.
Choose a high-quality stain-blocking primer rated for smoke and fire damage; shellac-based products usually stop deep discoloration best, while acrylics suit lighter residue. Clean, dry, and dull the wall first, then apply an even coat with proper ventilation.
Let it cure fully, inspect for shadowing, and spot-prime any remaining marks. Don’t skip this step to save time; unsealed soot can migrate through fresh paint and undo your work.
When you seal correctly, you protect the repair, support a clean result, and help everyone in the space feel like recovery is moving forward.
Remove Soot Odor and Acidic Residue
Soot odor and acidic residue don’t just linger after a fire; they continue to damage walls, ceilings, fixtures, and contents unless you remove them promptly. You need to neutralize both the smell and the film before they bond deeper into porous materials.
Start by ventilating, then dry-wipe loose soot with a chemical sponge, working top to bottom. Wash hard surfaces with the right alkaline cleaner, rinse lightly, and dry fast.
- Vacuum fabric and trim with a HEPA tool.
- Test cleaners in a hidden spot.
- Launder washable items separately.
- Replace HVAC filters after cleanup.
- Seal cleaned surfaces only after they’re fully dry.
When you stay methodical, you protect your space and help everyone feel at home again.
When to Call a Fire Damage Restoration Pro
Call a fire damage restoration pro when soot has spread beyond a small, surface-level area, when smoke odor persists after basic cleaning, or when acidic residue has reached porous materials, HVAC components, or hidden cavities.
You’ll need specialized cleaning when soot stains paint, etches glass, or settles into insulation, ductwork, and upholstery.
A pro can test residues, select the right dry or wet-cleaning methods, and protect finishes from further damage. They’ll also control airborne particles, seal contaminated zones, and reduce corrosion on metal, electronics, and fixtures.
If you’re unsure whether the damage is safe to handle, don’t guess—get an inspection. Acting quickly helps you join the group of homeowners who limit loss, prevent lingering odors, and restore indoor air quality efficiently.
Frequently Asked Questions
How Soon Should Soot Cleanup Start After a Fire?
You should start soot cleanup within 24 to 48 hours after the fire, if it’s safe. Delaying lets acidic residue bond, discolor surfaces, and worsen damage, so you’ll protect your space by acting fast.
Can Soot Damage Hidden Wiring or Electrical Systems?
Yes—soot can damage hidden wiring and electrical systems. Around 1 in 4 fire repairs reveal hidden electrical corrosion. You should shut off power, inspect outlets, breakers, and junctions, then bring in licensed electricians fast.
Are Household Vacuums Safe for Removing Soot?
No, you shouldn’t use household vacuums for soot; they can blow fine particles back into your air and damage filters. You’ll get better results with HEPA-rated equipment and safe, dry-cleaning methods.
What Protective Gear Is Best for Soot Cleanup?
You’ll want the full superhero kit: NIOSH-approved respirator, sealed goggles, nitrile gloves, disposable coveralls, and sturdy boots. This gear shields you from acidic soot, keeps particles off your skin, and helps you work safely.
How Can I Tell if Soot Has Contaminated HVAC Systems?
You can tell if soot contaminated your HVAC when you see black dust at vents, smell smoke after startup, or find residue on filters, coils, or ducts. Shut it down and inspect promptly with trained help.
Review
You can restore soot-damaged walls, ceilings, and contents by moving methodically: clear the area, vacuum first, clean from top to bottom, and test every solution before you commit. Keep moisture low, change cloths often, and stop if stains keep bleeding or odors linger. If damage is widespread, you’ll save time and prevent further harm by calling a pro. Think of it like tuning a steam engine—each careful step keeps the whole system running clean.